Welcome to Fab Studio Solo Progress
Documenting Progress in FabStudio
Welcome to Fab Studio Solo Progress, where I document my journey and progress in the fabstudio. Join me as I share my experiences, challenges, and achievements. Let's inspire each other and grow together.
01
Introduction to Rhino
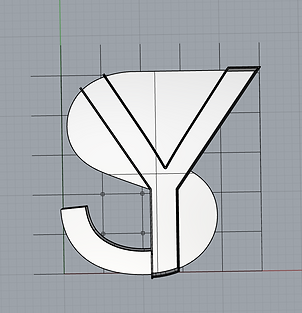
On the first week, I was introduced on how to navigate and use Rhino, a 3d drawing software. We were taught the basic functions of Rhino such as how to navigate and do simple commands like drawing lines.
Our first task was to create a floor plan using our initials. After adding the columns, we then had to extrude out walls to create a 3d object which resembles a house.


02
Introduction to 3D ptinting
During this lesson, we are first introduced to 3D printing, using the software Ultimaker Cura to help slice our 3D models for printing.
We learned the importance of supports by printing out a bridge structure with a long overhang. After drawing it out on Rhino, we exported it into Ultimaker to then print out. After the print, we realised that the bottom of the structure started sagging downwards due to the lack of support.
The solution is to either add support or print in another orientation where there is no need for overhangs.

03
3D printing practise
During this lesson, we are tasked to alter the settings of the 3D printer using Ultimaker cura to achieve the fastest print time possible while printing a calibration cube.
To achieve a faster print time, some settings can be changed
1. Turn on adaptive layers under experimental
2. Change infill pattern to lighting
3. Decrease infill density to 5%
4.Change resolution for faster print (Affects printing quality)
4. Increase wall thickness and layer height ( Affects printing quality)


For the next practice, we learnt how to split a model on Ultimaker cura. Splitting the model allows a faster print time for model as lesser support structures are needed. To split the model, calculate the midpoint of the model and change the Z position of the model and depress the model to the base plate of the printer.


For the next practice, we learnt how to add support to structures in Ultimaker cura. To start, an extension is needed to add support manually.
https://github.com/5axes/Calibration-Shapes/releases/tag/V2.2.4
After downloading the extension, you will be able to add custom support cylinder into your 3D model. This would allow more specific placement for your model.


